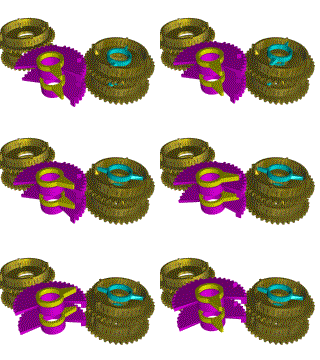
Restoring the value of a number wheel
 |
Notice that the sector wheels are not symmetrical. A gap can be
seen right in the middle and two sets of teeth to each side. While the ones on the
right are flush with the body of the wheel, the ones on the left are higher, almost three
times as high. This allows the sector wheel to be partially engaged, that is, to
remain engaged to one figure wheel and disengaged from the other.
|

The animation above starts where the previous left off. The magenta sector wheel
raises so that the teeth on the left side disengage the even figure wheel, at left on the
background while the larger teeth on the right remain engaged. Then, the yellow
sector wheel restore arms start to turn, eventually engaging the corresponding nibs
protruding from the sector wheels. Notice that, once again, each sector wheel starts
to move at a different time. If they held a 99, they would be engaged right away,
but since they hold a 35, they are engaged past half way, the bottom one, holding the 5
two units before the upper one. While the sector wheels move, they carry along the figure
wheels at right, effectively restoring them to their original values, while leaving alone
the figure wheels to the left.
At the end of this sequence, the sector wheels raise to their topmost position,
completely disengaging from both figure wheels and the yellow restore arm comes back to
its resting position.
The light blue arm is also rotating, but it is completely disengaged from the figure
wheel, having been raised above the level of the inner teeth at the start of this
sequence, and it is just going to its resting position, in preparation for the next
cycle.

Here is another view of the same sequence as above, from the other side and almost
level with the upper figure wheel. The different size of the teeth on the bottom
sector wheel is clearly visible. The gap in between the two sets of teeth can be
seen at the bottom right of the image. The sequence starts with the sector
wheel rising to a point where it still remains engaged to the left figure wheels and it
ends when it is fully raised until disengaged completely, as can be appreciated in the
upper sector wheel (due to the perspective, the bottom sector wheel seems to remain
engaged, but it is not so).


